Replacing recessed lighting fixtures can be an intimidating task, but it doesn’t have to be. With a few simple tools, you can easily remove recessed lights from their housing clips.
There is a trim ring around the fixture, which helps to put up the modern aesthetic by covering the jagged edges of the wall or chipped-off paint.
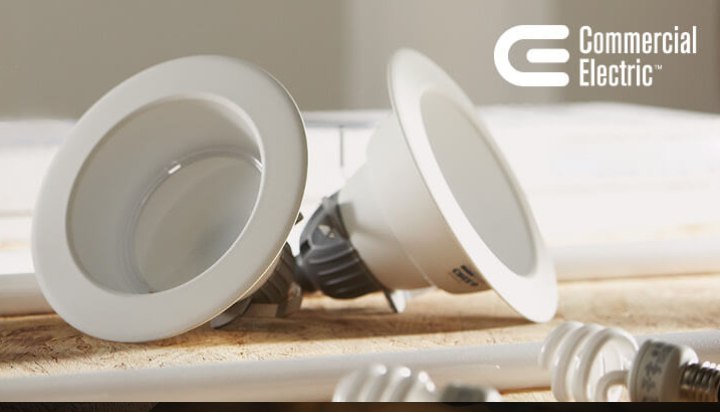
However, to change LED bulbs or clean the recessed light, you will need to remove it from the housing clips. Once you’ve removed the recessed lights, you can then proceed with replacing them with new fixtures.
This article will provide you with a step-by-step guide to removing recessed lights from their housing clips, as well as some tips to make the job easier.

How to Remove Recessed Lights from Housing Clips?
Here, we will break down how to change bulbs in recessed ceiling lights with a cover step-by-step.
The first 3 steps are actually quite standard. It is something you would also need to do if you were to follow the instruction on how to cut plastic ceiling light panels.
Step 1: Turn the Power Off
Oftentimes people start dealing with electrical components without turning the power off, which is extremely hazardous. Therefore, you want to avoid this grave mistake at all costs to keep your life from any risks!
Firstly, switch off the light switch, followed by switching off the circuit breaker.
Step 2: Step Up
Since recessed lights are on the ceiling, you will need something to get you up to that height.
Using a ladder or stepping stool would be the best option; just ensure that whatever you are using is sturdy, so you do not fall while doing your job.
Step 3: Take Out the Light Bulbs
This step is very basic, and almost all of us do it regularly, so we do not have a lot of instructions for it. However, you want to gently unscrew the bulb, so it does not get damaged.
If you exert too much pressure, the bulb will shatter since it is made of glass. After you are done unscrewing the light bulbs, simply come down and place them somewhere safe.
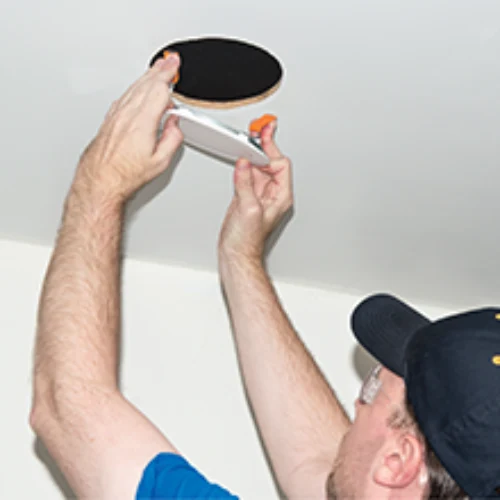
Step 4: Get Hold of the Recessed Spring and Take Out the Trim Ring
For the next step, you will have to put your hand into the housing of the recessed light fixture. Just for safety reasons, you might want to wear mechanical gloves.
The trim ring that goes around the fixture is quite often held with springs, just unhook the springs from their slots and then remove the trim ring.
In some cases, the springs can be a bit different with two legs and a center which is coiled.
If your trim ring is like this, you have to tug at the trim ring, and then you will be able to see the two legs, which you will have to squish together to remove the ends of the legs from the housing.
What Are the Necessary Safety Measures for this Task?
Although we have mentioned which precautions to take while dealing with electrical components, we would like to elaborate on it for your safety.
Pat your hands dry before you touch anything, and if possible, have some sort of footwear such as sandals on when carrying out the task.
If you have any mechanical gloves around, put them on just to be safe, and of course, before the removal of the recessed lights from housing clips, you have to turn the power off by both the light switch and circuit breaker.
These precautions are applicable for most electrical jobs, such as the process of how to remove LED flush mount ceiling lights.
Although you are not dealing with direct wires here as you would if you were carrying out the task of converting downrod ceiling fans to flush mounts, you still need to be very careful.
What to Do If You Can’t Remove the Recessed Light?
If you’re having trouble removing a recessed light, there are a few steps you can take to try and resolve the issue. Here are some suggestions.
Check for obstructions:
Make sure there are no obstructions blocking the light from coming out. This could include debris, insulation, or other materials that have gotten into the housing.
Check for damaged clips:
If the housing clips are damaged, they may not be able to hold the light securely. Check for any visible signs of damage and replace the clips if necessary.
Try using a different tool:
If you’re using a screwdriver to remove the light and it’s not working, try using a pair of pliers or a wrench instead. These tools may be able to provide more leverage and help you loosen the light.
Check for corrosion:
If the light has been in place for a long time, corrosion may have developed on the clips or housing. In this case, you may need to use a penetrating oil or rust dissolver to loosen the light.
Get help from a professional:
If you’re still having trouble removing the light, it may be best to seek help from a professional electrician. They will have the knowledge and tools to safely and effectively remove the light for you.
It’s important to remember that electrical work can be dangerous, so it’s always best to proceed with caution and seek help if you’re not comfortable or capable of completing the task.
Summary
By following the simple steps outlined in this article, you should have no problem removing your recessed lights from their housing clips.
Be sure to use the right tools and safety precautions to ensure a safe and secure installation. With these tips in mind, you’ll be able to enjoy the beauty and functionality of your new recessed lighting fixtures for years to come.
![Fluorescent Light Is Flickering [Cracked The Fix!]](https://wiringsolver.com/wp-content/uploads/2023/02/Fluorescent-Light-Is-Flickering.jpeg)
![How To Remove Plastic Ceiling Light Cover? [3 Methods]](https://wiringsolver.com/wp-content/uploads/2021/09/How-To-Remove-Plastic-Ceiling-Light-Cover.webp)