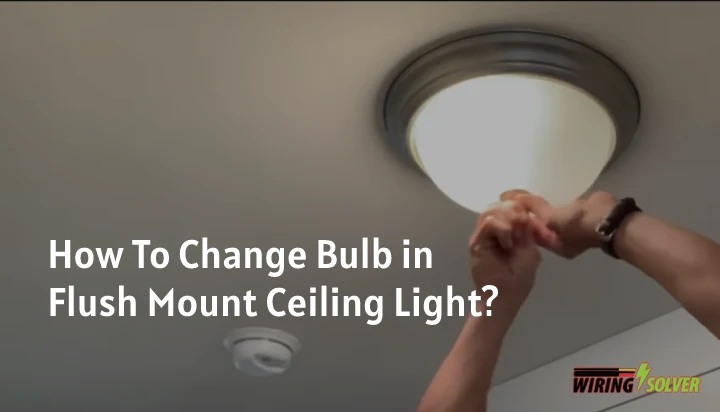
Flush mount ceiling lights are a popular lighting choice for many homes, but changing a bulb can sometimes be a bit tricky. However, with a few simple steps and tools, anyone can change a bulb in a flush mount ceiling light with ease.
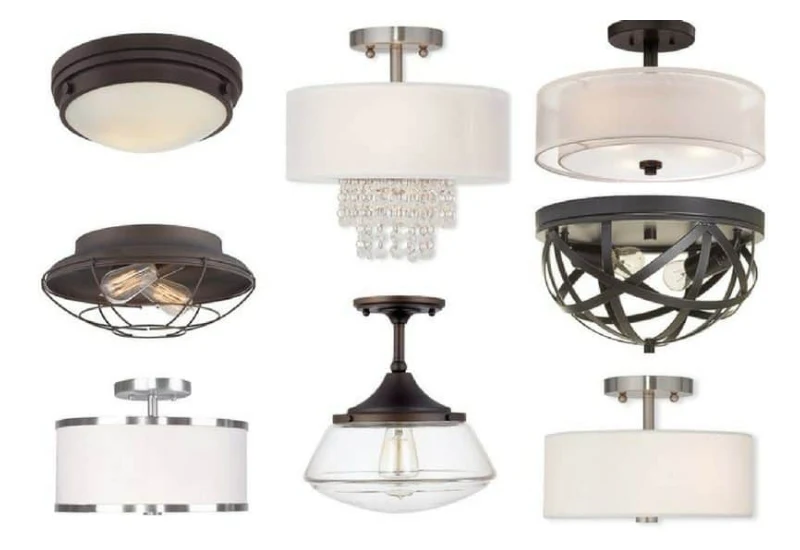
The first step is to gather the necessary equipment for the task. After which the process may vary based on the type of ceiling fan and setup you have. Three common types are screw mounted, notched and spring loaded light covers.
This article will guide you through the process and provide you with all the information you need to change a bulb in your own home.
What Do You Need to Change a Flush Mount Ceiling Light?
To change led bulb in flush mount ceiling light, you will need a few things. These include:
A Ladder or Stepladder
Due to how flush mounts work, they are often placed higher up and not always easy to reach. So you will often need a ladder to properly reach up to the light cover.
Make sure you have the properly sized ladder and that it is stable. This helps make the changing procedure much easier and smoother.
Screwdriver
One particular way that light covers are attached is by using screws on the side. You will require a screwdriver of the appropriate size and shape to unscrew them and be able to take out the screws.
Although there are other ways to attach a light cover, depending on your flush mount light, you won’t always need a screwdriver.
Duct Tape
While not always needed, duct tape can be used to wrap around the light bulb. This makes the unscrewing process much safer and easier to do since it gives you a solid grip on the bulb while also protecting your hand.
How to Change LED Bulb in Flush Mount Ceiling Light?
There are different ways to remove the light cover of your flush mount light, and it primarily depends on what method is used to attach it.
Remember to always turn off the lights and wait 10 minutes for the bulb to cool off before you attempt to change it. Three methods primarily exist, and they are:
Screw Mounted Light Cover
This light cover is characterized by 4 screws that attach it to the ceiling. You will require a screwdriver to loosen the screws. Depending on the type of house, you may need to know how to cut plastic ceiling light panels to help with flush mount ceiling light installation.
While loosening the screws, make sure you hold the dome or cover it up with one hand to ensure it does not fall. After unscrewing all the screws, hold the light cover with both hands and slowly place it down.
Notched Light Covers
These don’t feature screws but instead have a notch mechanism that, when pressed, will allow you to twist the cover off. They are the easiest types of light covers to remove, with the only difficulty being in locating the notch.
Most of the notches are located at the top of the light cover, close to the ceiling.
Spring Loaded Covers
Some light covers are held by a frame that is attached via springs and clips. The clips may be recessed clips which might make it difficult as you will need to know how to remove recessed lighting clips.
Squeezing the clips on the sides will loosen the ring. Pull the ring down, and you should be able to spot the springs, which you can then remove the clips from. After this, the light cover can be removed, exposing the bulb.
After removing the cover, you can wrap duct tape around the light bulb and then unscrew it. You can then screw in the new light bulb and put back the light cover.
Safety Precautions for Changing a Light Bulb in a Flush Mount Ceiling Fan
Safety precautions are an essential part of changing a bulb in a flush mount ceiling light. It’s important to take the necessary steps to ensure your safety and prevent any electrical shocks.
This section will go over some of the safety precautions you should take when changing a bulb in a flush mount ceiling light.
- The first and most important safety precaution is to turn off the power to the light. This can be done by turning off the circuit breaker or removing the fuse that supplies power to the light. This will prevent any electrical shocks and ensure your safety.
- When changing a bulb in a flush mount ceiling light, you’ll need to use a ladder. Make sure the ladder is sturdy and in good condition, and that it’s placed on a flat and level surface. Always use both hands to grip the ladder when climbing, and keep three points of contact with the ladder at all times.
- When working with electrical fixtures, it’s important to wear protective gear. This can include gloves, safety glasses, and shoes with non-conductive soles. This will help protect you from electrical shock and other hazards.
- When changing a bulb in a flush mount ceiling light, be aware of your surroundings. Make sure that no one is standing underneath you, and that there are no objects that could fall and cause injury.
- When handling the bulb, make sure to use caution. Do not touch the glass part of the bulb with your bare hands, as this can leave oils from your skin on the bulb, which can shorten its lifespan.
By following these safety precautions, you can change a bulb in a flush mount ceiling light with confidence, knowing that you are taking the necessary steps to ensure your safety.
Summary
Changing a bulb in a flush mount ceiling light doesn’t have to be a difficult task. With the right tools and a few simple steps, you can easily change a bulb in your home, ensuring that your room remains well-lit.
It’s crucial to remember to always turn off the power to the light before beginning, and to exercise caution when working on a ladder. However, if you have any concerns or questions, it’s always best to consult with an electrician or professional.
![How To Remove Plastic Ceiling Light Cover? [3 Methods]](https://wiringsolver.com/wp-content/uploads/2021/09/How-To-Remove-Plastic-Ceiling-Light-Cover.webp)
![How to Fix Hole in Ceiling from Light Fixture? [Full Guide]](https://wiringsolver.com/wp-content/uploads/2021/09/How-to-Fix-Hole-in-Ceiling-from-Light-Fixture.webp)

![How to Reset Feit Smart Bulb & Reconnect? [Explained]](https://wiringsolver.com/wp-content/uploads/2023/01/How-to-Reset-Feit-Smart-Bulb.jpg)