Light fixtures are an essential aspect of any home, but sometimes they can become outdated or in need of cleaning. These light covers can be challenging to remove.
This is especially true if the cover is screwed in, or if it has clips that hold it in place. In this article, three methods for removing plastic ceiling light covers will be shown with a detailed step by step guide.
These three methods are based on plastic ceiling light covers with screws, without screw, and with clips. This guide will provide you with the information you need to get the job done quickly and easily.
How to Remove Plastic Ceiling Light Covers with Screws?
To begin, have a look at how to take off ceiling light covers with screws that need to be removed.
Step 1: Step up
First off, you need to get hold of a stepping stool or, even better a ladder to reach the ceiling light comfortably.
Step 2: Put some gloves on for protection
You might want to also wear any sort of gloves, plastic or rubber, to avoid scratching your hands or to prevent them from getting dirty.
If you have mechanic gloves lying around, it is the best option, but it’s not something essential.
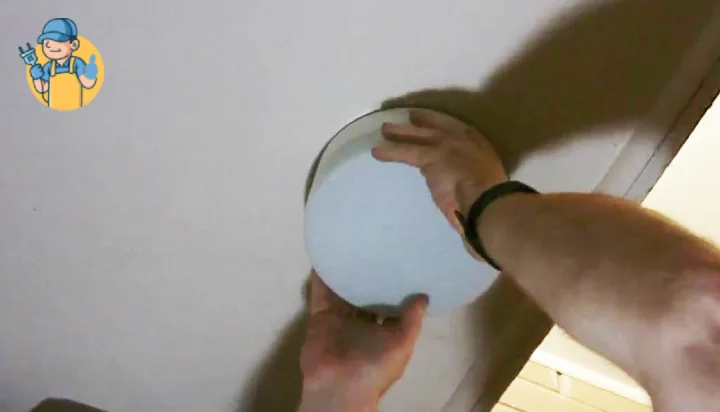
Step 3: Grip onto the ceiling light cover with one hand
It is crucial to hold on to the cover using one hand before you start removing it so it does not come crashing down and break.
Step 4: Use the other hand to start unscrewing the knob
After you hold on to cover with one of your hands, you will need to take your other hand and grab a tool to unscrew the knob.
You might be able to unscrew the knob with just your hands but still, keep some screwing tools when you get up to remove the cover.
Step 5: Find a Washer that is holding the cover
Once you have completely unscrewed the knob, your plastic cover should come loose, but if it is not loose, then it might be because a washer is holding the cover.
If that is your case, then you will have to search for a washer and remove it.
Step 6: Take the Cover Off
This step is not actually anything critical, you just take the plastic cover into your hands and carefully place it somewhere and you are done.
How to Remove Plastic Ceiling Light Covers Without Screws?
Plastic ceiling light covers which are held by screws, follow a very similar process to the ones which have screws. Here, you will also have to get a ladder or a stepping stool to get up, wear gloves for safety, and grip the cover with one hand.
Hence, the first 3 steps are the same, so we will be now telling you the steps from Step 4 on how to remove ceiling light covers with no screws.
Step 1: Twisting the Cover Counter Clockwise
With ceiling light covers without screws, the removal process requires you to rotate the counter-clockwise, or if you have trouble understanding that, it just means you have to rotate it to your left.
Be careful not to rotate it too hard, or else it might crack. In addition to that, never remove your hand from below the cover because you might not be aware of when the cover might come off when you’re removing it.
Step 2: Hitting the Cover When it Gets Stuck
At times, the cover can get stuck for which rotating it can get difficult. People often get frustrated and put in all their strength to get it removed, which can damage the light fixture.
Use a rubber tool to hit the light cover very lightly to get it unstuck. In fact, the sole of a shoe does this job very well, so you might consider using one for this step.
Step 3: Taking the Cover Off
Then you are done; just carefully take down the plastic cover and change the bulbs of your recessed ceiling light or dust off the dirt that has collected in the cover over the years.
How to Remove Plastic Ceiling Light Covers with Clips?
Just like the two processes we have described above, this method has the exact same first 3 basic steps, which you will need to follow.
Get a sturdy tool or ladder, wear your mechanic gloves or any sort of gloves actually, and hold the cover in place. Now let us begin from step 4 on how to remove the ceiling light cover with 3 clips.
Step 1: Look for the Clip that is Loose
In-ceiling light covers amongst the 3 clips, one of them should be removable, which is why it is a bit loose. You do not want to pull the wrong clip and cause any damage, so just check which one can be pulled out.
Step 2: Pull the Clip, and Take the Ceiling Light Cover Off
After you get your fingers around the clip that can be moved, pull it with some of your strength, but do not tug at it aggressively. With the right grip, the clip should come away from the cover right away.
After you have pulled the clip far out, the cover can be removed if you pull it. When you gently pull the plastic cover out, it will come off the mount and into your hands, and then you can place it down.
Final Words
In conclusion, removing a plastic ceiling light cover can be done in a few different ways. The three methods mentioned in this article – with screws, without screws, and with caps.
The effective ways to remove a plastic ceiling light cover for each of these methods have been covered properly. The method you choose will depend on the type of cover you have and the tools you have on hand.
By following these simple steps, you can quickly and easily remove your plastic ceiling light cover, giving you access to change a bulb or update the fixture.