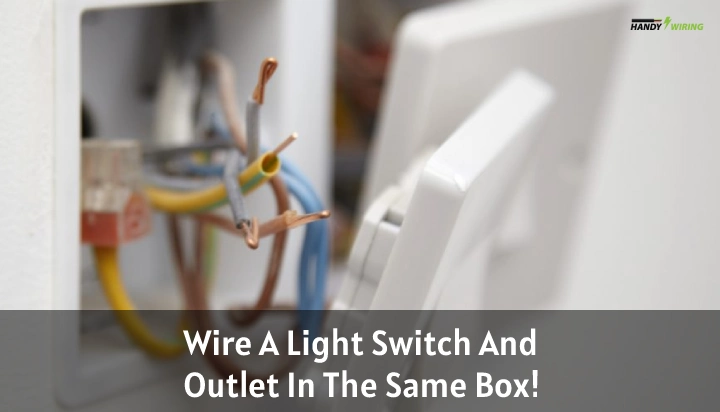
It is a common practice in home and office outlets to have a light switch attached in the box along with the outlet. How is it connected?
A hot wire is passed through the switch to the light. The switch is placed in the box. Similarly the hot wire source is also passed parallel through the outlet. Thus the switch and the outlet are connected in the same box with different purposes.
Let’s learn practical demonstration on wiring a light switch and outlet in the same box here in this article below.
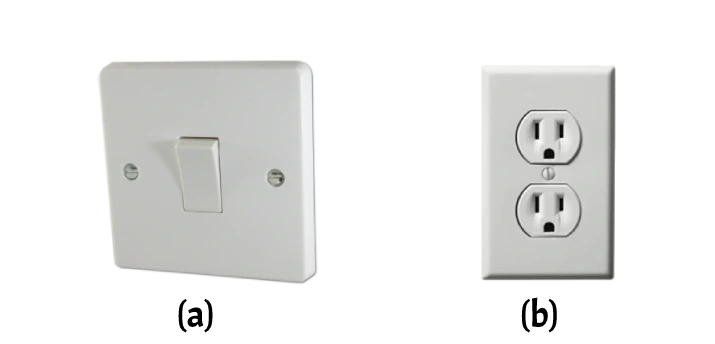
What Is A Light Switch And An Outlet?
The simple version of switch that we use in our home or offices is known as a light switch. And the plug in which we connect our power cords is called an outlet.
How Does A Light Switch Works And How Is It Connected?
A light switch works by cutting off and on the circuit. When the circuit is cut off the light is turned off. And when the switch is on the circuit is complete, thus the light turns on.
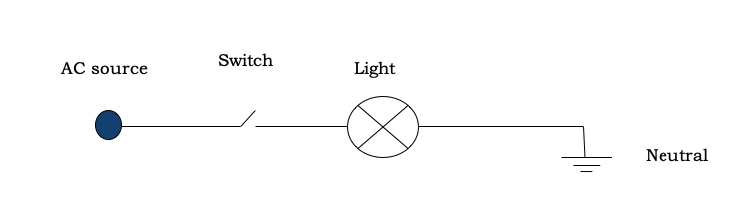
As shown in the Fig 2, the wiring of the switch can be easily understood. The switch is normally placed in between the source to device wire.
In switch on state the circuit is closed and current flows through it. While in off state the circuit is open and current cannot flow through it.
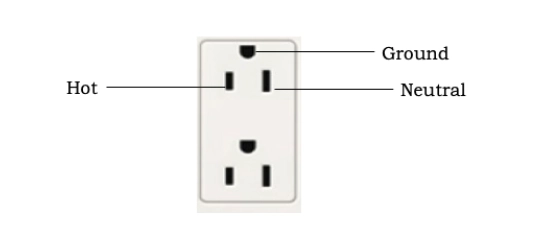
What Are The Terminals In An Outlet?
The outlets in homes or offices can be two pin or 3 pin outlets. In both of them a Hot wire and a Neutral is common. But there is an additional Ground wire in the 3 pin outlets.
I am going to show you a 3 pin outlet. So that you can have an idea on both type.
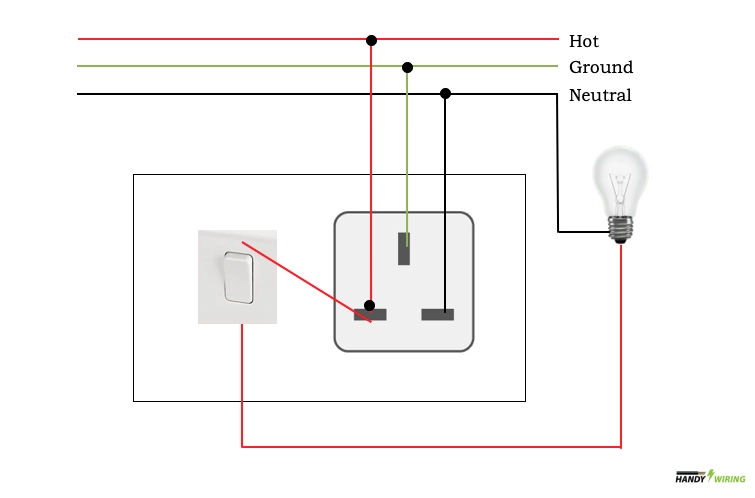
How To Wire A Light Switch And Outlet In The Same Box?
To do this we have to combine fig 2 and fig 3. I am going to show you the wiring system with a hand drawn diagram.
Procedure:
Step 1: Open the outlet box and loose the terminal screws.
Step 2: Connect the hot, neutral and ground to the respective terminals of the outlet as shown in fig 4.
Step 3: Take another red wire. Connect it to between the hot terminal of the outlet and any terminal of the switch.
Step 4: Connect another wire in the other terminal of the switch to the line terminal of the light bulb as shown in the figure.
Step 5: Connect the neutral terminal of the light to the neutral of the source.
Step 6: Tighten the screws and cover the outlet box as before.
That’s it. Your setup is ready to use. Isn’t it easy? Yes, now you know the basic theme of the setup. You can modify it according to your need. I am going to show you some alternative and commonly needed setups in the next sections.
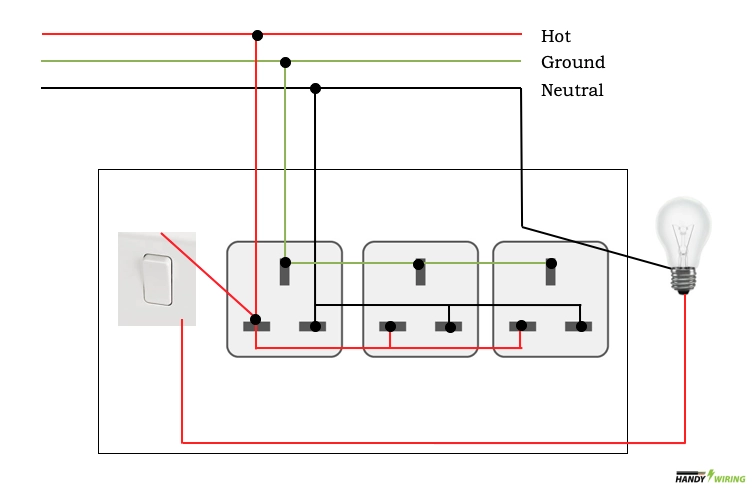
How To Wire Multiple Outlets And Lights On The Same Circuit?
Whenever we need to add multiple outlets we have to add them in parallel. Since there should be equal voltage supply in each outlet, it is a rule you must remember. Let’s have a look at the wiring diagram.
Procedure:
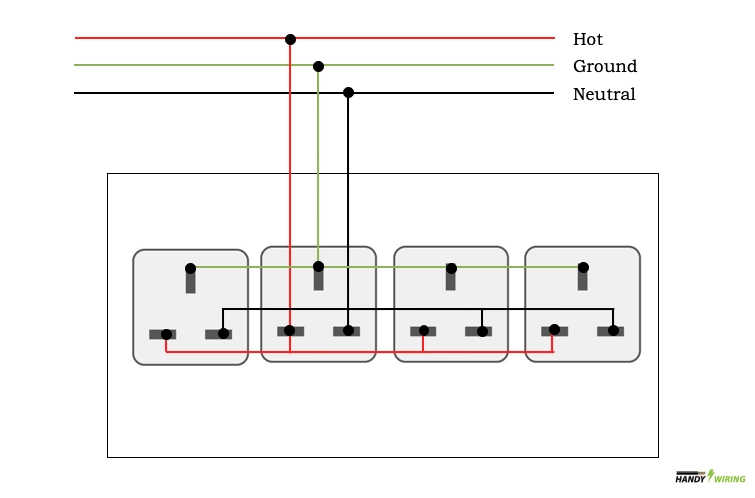
As you can already see that the wiring principle is same as the previous one. The only change is the addition of multiple outlets. It is a basic electrical law that to maintain the same voltage you have to add the outlets in parallel.
In this case after wiring the first outlet, we have to connect all the grounds of the other outlets to the ground of the first one. Same goes to the hot and neutral wire too.
How To Wire Multiple Outlets On The Same Circuit?
To make it simple like this we just have to remove the light switch from the circuit. We can add more outlets if we want.
What To Keep In Mind?
When using multiple outlets we need to keep certain things in mind. Like-
- Multiple outlets means more device connection. Which leads to more current consumption or flowing through the main wire of the outlet box. So, the currenct capacity of the wires must be checked before use.
- Using lower current capacity wire can cause melting of the wires or flaming.
- Since there are multiple outlets in a limited space, it is essential to check for any leakage of insulation in the wires. Otherwise there can be short circuits in the box.
- Since there are multiple wires in the connection terminals of the outlet. Be sure to tighten the screws firmly after connecting the wires.
Precautions You Need to Take:
While working with electrical items always take the following precautionary steps:
- Always power off you main switch or atleast the circuit breaker of the room you are working in.
- Wear shoes to make yourself insulated to the ground to avoid electric shocks
- Use a tester to check for currents before touching the wires
- Use the right colored wires to avoid confusion and make the circuit easier to read.
- Beware of short circuits, so while connecting the cables make sure to insulate the open wires with a tape.
- If you are new in this, take the help of an electrician or experienced person first.
Conclusion
This setup is a very common and useful for home and especially office appliances. Hopefully, you will not need an electrician to depend on for such modifications to your home modules.
So, the next time it is you who is going to design your own electrical outlet boards of your house in the right place in the right way. Just buy the apparatus and give it a go.. Good luck!
![Kasa Smart Switch TroubleshootIng! [Complete Guide]](https://wiringsolver.com/wp-content/uploads/2022/10/How-to-Troubleshoot-a-Malfunctioning-Kasa-Smart-Switch.jpg)
![GFCI Outlet RESET Button Won’t Stay In When Pushed [Solved]](https://wiringsolver.com/wp-content/uploads/2023/02/GFCI-Outlet-RESET-Button-Wont-Stay-In-When-Pushed.jpeg)