Key Points:
- Wiring plugs is often times a very simple procedure that anyone can do themselves if they follow the steps properly.
- It is possible to wire four prong plugs with only three wires by following a specific wiring diagram.
- It is necessary to take proper safety precautions before proceeding with any sort of electrical operations.
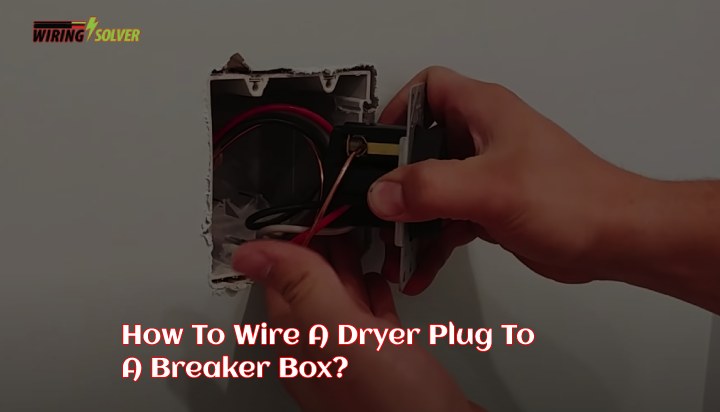
Often times you might have a four prong fixture installed in your home. And it is vastly easier to replace the plug of the appliance than to reinstall a different fixture with three prongs. So, how to wire a 4 prong 220v plug with 3 wires?
There are certain steps to follow for figuring out how to connect a 4-wire stove to a 3-wire outlet. The first one being the gathering of necessary equipment and tools. After you have gathered the necessary tools, the steps are to turn off the power, wiring the plug with 3 wires and troubleshooting.
Throughout this article, I’ll discuss all of these steps in details. So, let’s head on with the installation procedure.

What is the Difference in Wiring?
The key difference in the wiring configuration between a 3 wire configuration and a 4 prong plug is that, the 3 wire cord has only two hot wires and one neutral wire, there is no separate ground wire included in the 3 prong plug.
The old 3 wire configuration would trip the breaker in the case of a short circuit, but in the separate ground configuration, the entire bare ground and metal case would be energized.
A 4-prong cord, by contrast, has a separate ground wire, which means that the dryer’s neutral and ground are not connected together. Which minimizes the chances that the appliance’s metal case will become energized during an open neutral condition.
When you convert from the 3-prong to the 4-prong configuration, you must make sure that the appliances neutral terminal is not connected to the case ground.
Gathering Necessary Tools
Before proceeding with any electrical tasks, it is highly advised to gather all the necessary tools required for the job. To figure outhow to change a 3 prong stove outlet to a 4 prong, you must first acquire 4 prong plug.
Required tools for wiring a dryer outlet
- Screw Drivers: Screw drivers are needed to remove any cover plate that might obscure the wiring terminals.
- Wire Strippers: Wire strippers are used to strip wires before the connection to ensure proper flow pf electricity.
- Rubber Boots and Gloves: Rubber boots and gloves ensure that you remain safe from any electrical hazards during the installation procedure.
- Voltage Testers: Voltage testers ensure that the cables or wires you are working with does not contain any electricity. As it is very risky and dangerous to work with live wires.
Turning Off the Power
The first and most important step in knowing how to wire a 4 prong 220v plug with 3 wires is to disconnect it from all power sources. However, if you have a 480 volts 3 phase supply, you might take a look into a 480v 3 phase to 240v single phase transformer.
How to turn off the power?
- If you want to switch off the electricity from a local circuit breaker, first figure out which circuit breaker supplies power to the outlet you want to turn off.
- You may also turn off the main breaker, but this would cut off all power in the house.
- Simply turn the switch once you’ve selected the suitable breaker.
- Check the LED indication to ensure there is no electricity to the outlet.
- If there are no indicators, you can examine the circuit with a volt meter or an ammeter.
Wiring the 4 Prong Plug with 3 Wires
The most important aspect of any electrical component installation is to make sure everything is connected properly. However, the connections are different if you’re trying to wire a 3 prong dryer outlet to 4 wire install.

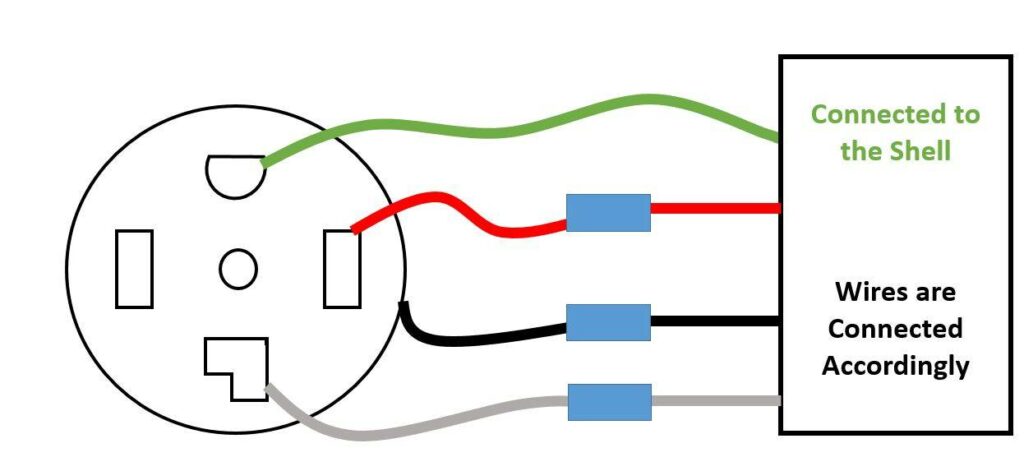
How to wire a 4 prong plug with 3 wires?
- Remove the jumper from neutral to ground if there was a 3 prong plug installed before.
- Connect the red and black wires to the line wires of the plug (Fig 2).
- The white neutral wire is then connected to the middle terminal or the neutral wire (Fig 2).
- Then connect the green ground wire to the unit’s ground shell (Fig 2).
- Make sure the nuts are securely fastened.
- Plug in and replace the cover.
- Then test, reinstall, and run the unit as usual.
Because the use of ground wire for neutral is now prohibited by the electrical code, the 4 wires are now required. Alternatively, if you wanted to know how to wire a 3 prong lighted toggle switch, your steps might be different.
Troubleshooting
It’s critical to troubleshoot any electrical component after it’s been installed to ensure it’s working properly.
Testing the 4 prong plug
- Turn on the power at the main panel or the circuit breaker that was turned off at the start of the installation.
- Check the switchboard’s LED indicators to make sure the power is back on.
- Turn on the appliance.
- Make sure the plug is inserted in the fixture properly.
- To ensure that the appliance is in good working order, try running it for a few minutes.
- Keep an eye on the appliance or fixture for any signs of overheating or sparks.
If all the steps mentioned above, checks out perfectly, you can rest assured that you have made the installation properly.
Summary
In this article, I’ve gone through all the necessary steps on how to wire a 4 prong 220v plug with 3 wires. I hope that by following the step by step instructions in this post you will find connecting a four prong plug with three wires simple and straightforward.
However, before engaging in any electrical activities on your own, be cautious and take all necessary precautions. Do not hesitate to call a professional if necessary.
![Can You Plug A Fridge Into A GFCI Outlet? [Answered]](https://wiringsolver.com/wp-content/uploads/2022/05/Can-You-Plug-A-Fridge-Into-A-GFCI-Outlet.jpeg)
![How To Wire A 2 Pole GFCI Breaker Without Neutral? [Full Guide]](https://wiringsolver.com/wp-content/uploads/2022/05/How-To-Wire-A-2-Pole-GFCI-Breaker-Without-Neutral.jpeg)
![GFCI Outlet RESET Button Won’t Stay In When Pushed [Solved]](https://wiringsolver.com/wp-content/uploads/2023/02/GFCI-Outlet-RESET-Button-Wont-Stay-In-When-Pushed.jpeg)