Light fixtures can play a crucial role in illuminating a room and enhancing its aesthetic appeal. However, when one of these fixtures becomes damaged, it can result in unsightly holes in the ceiling.
The method and steps depend on the size of the hole of the fixture. It is necessary to gather the equipment in the first place. After that, the steps are to clean the area, place the drywall patch, and finally clean up the location.
This article will guide you through the process of fixing a hole in your ceiling caused by a light fixture, and give you tips on how to do it effectively and efficiently.
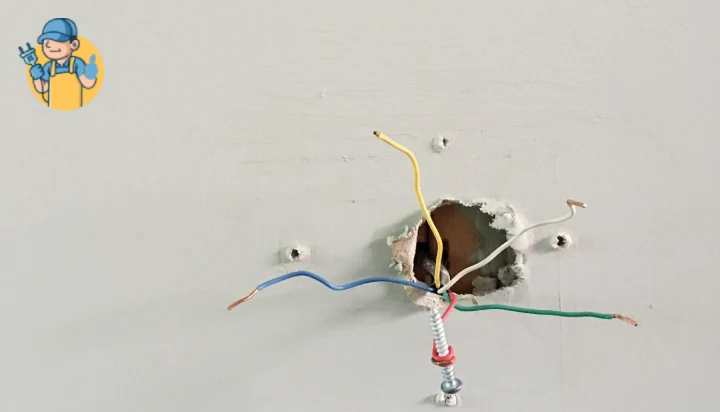
How to Fix Hole in Ceiling from 2 Types of Light Fixtures
Different light fixtures require different dimensions. Hence when you wonder how to fill a ceiling light hole, you have to analyze if the gap is small, medium-sized, or large. Light fixtures usually form medium-sized holes.
However, flush-mount ceiling fans with lights and recessed lighting leaves a rather larger gaping hole.
The difficult part is over when you have removed the recessed lighting housing and a flush mount ceiling fan with lights. To fix the ceiling light hole, follow the steps mentioned below.
For Small and Medium-Sized Light Fixture Ceiling Holes:
Step 1: Acquire the Tools and Take Safety Precautions
To patch any holes in the ceiling, you will be working with a joint compound, drywall, screw, utility knife, measuring tape, saw or putty knife, and pencil.
You have to gear up with goggles, face masks, and gloves to protect yourself from inhaling any dust or dodging any unwanted cuts.
Step 2: Clean the Exposed Surface Area if You Spot Rubble
Using a home knife or utility knife, chip away any rubble, paper, or drywall collected around the hole.
You have to do this so that the new drywall patch does not sit awkwardly in the ceiling, making it look out of place. Getting rid of such debris will allow your drywall to sitting smoothly against your roof.
Step 3: Place the Drywall patch in the Hole
First, measure the size of the light fixture hole. After that, cut a piece of drywall repair patch to a size slightly larger than the dimensions you measured.
Peel the drywall patch from the adhesive and carefully place it over the light fixture gap.
Step 4: Apply a Thin Layer of Joint Compound Over the Drywall
A joint compound, popularly known as a drywall compound, has a thick consistency lathered over the drywall to form a smooth base.
Hence, once you adhere to the drywall, lather some joint compound over the drywall with a knife to achieve a clean look.
Moreover, this will allow paint and other interior papers to stick to the ceiling. Just like that, you know how to fill a ceiling light hole.
For Large Sized Light Fixture Ceiling Holes:
Step 1: Take safety precautions like wearing a dust mask, goggles, and gloves while working.
Step 2: Gather your tools like a pencil, drywall saw, knife, thin board strips, screws, and sandpaper.
Step 3: Take the dimensions of the gap and cut a piece of drywall repair patch to fit in the hole. Remember to make the drywall repair patch larger than the hole so that you can make essential adjustments.
Step 4: After taking the dimensions of the hole, take the dimensions of the light fixture to understand whether the light fixture does not cover the hole or whether it does fill the gap.
Step 5: Cut the necessary dimensions from the ceiling wall using a drywall saw. This is necessary to change the size of a ceiling light fixture hole.
Step 6: Cut two thin boards to size to fit perfectly into the ceiling hole. Then screw the boards into the ceiling with a drywall screw.
Step 7: Attach the drywall repair patch to the ceiling using a drywall screw.
Step 8: Apply joint compound or spackle over the drywall repair patch and smooth it over with a knife to complete the task. This way, you can paint over the patch in the future.
Tips for a Successful Repair
You might be in need of a few tips in order to complete a successful repair. Below are some such tips that will help you achieve the perfect repair.
Measure twice, cut once:
Before cutting a patch for the hole, measure the size of the hole carefully. This will ensure that your patch fits snugly and securely in place.
Use the right tools:
Invest in good quality tools, such as a drywall saw, sandpaper, and a putty knife. These tools will make the repair process much easier and more effective.
Clean up thoroughly:
Before beginning the repair process, clean the area around the hole thoroughly. This will help the spackling or joint compound to adhere properly to the surface.
Use multiple thin layers:
When applying the spackling or joint compound, use multiple thin layers instead of one thick layer. This will help the material to dry evenly and reduce the risk of cracks or shrinkage.
Sand gently:
After the spackling or joint compound has dried, sand the surface gently until it is smooth and even. Use fine-grit sandpaper and be careful not to sand too aggressively, as this can damage the surface.
Summary
In conclusion, fixing a hole in the ceiling caused by a light fixture doesn’t have to be a difficult or time-consuming process. By following the steps outlined in this article, you can effectively and efficiently repair the damage, and restore the look of your ceiling.
With the right tools, materials, and a bit of patience, you’ll be able to get the job done in no time. Don’t let a hole in your ceiling spoil the appearance of your home – take action today, and enjoy a beautiful, seamless ceiling once again.


![Can You Plug A Fridge Into A GFCI Outlet? [Answered]](https://wiringsolver.com/wp-content/uploads/2022/05/Can-You-Plug-A-Fridge-Into-A-GFCI-Outlet.jpeg)
