Key Points:
- Ceiling fan regulators are an essential component to control the speed of the fan.
- Based on the type of regulator it can contribute to energy savings.
- Installation of a regulator to a switchboard is an easy task that can be accomplished effortlessly.
Ceiling fans often have a regulator connected to them. It helps control the speed of the ceiling fan by changing the speed of the motor. Often times a fan might not have a regulator installed.
There are certain factors and steps that one needs to learn, in order to know how to connect fan regulator to the switchboard. Such as choosing a regulator, turning off the power, removing switchboard cover, identification of wires, wire connection and troubleshooting.
Throughout this article, I’ll discuss all of these steps in details. So, let’s head on with the installation procedure.
Connecting a Fan Regulator to the Switchboard:
1. Choosing a Proper Regulator
Before starting the process there are multiple components that you have to acquire. The main component is the regulator. Other itemsinclude an appropriate regulator, proper wiring, electrical tape, electrical toggle switch etc.These can be easily found in hardware store in your area.
But, before buying the wire you have to do a bit of a calculation. For example, what size wire for 50 amps at 150 feet. This will depend on your fans specification and wire distance.
Different types of regulators and specifically how does a fan speed regulator work are discussed below.
Choosing an Appropriate Regulator
- Resistive Regulator: It’s usually a box-style regulator that is commonly found in households. The increase of resistance lowers the voltage supplied to the fan. It’s one of the best for residential use.
- Inductive Regulator: An inductive regulator is a device that provides variable output voltage by changing the inductive coupling between a primary and a secondary or driven winding.
- Capacitive Regulator: The voltage across the fan is regulated by a capacitor, and the voltage present across the fan controls the fan’s speed. Because they offer better speed control, run silently, and are more stable, capacitive regulators are thought to be more energy efficient than electronic regulators.
Based on the types of regulators mentioned above, you can choose the one best suited for your use. All of them are electrically compatible with your switchboard.
A question many people have, “Does fan regulator save electricity?”. It depends on the type of regulator used. Most new regulator types save electricity up to 27%. But the old models do not usually contribute to energy savings.
2. Turning Off the Power
The first and most important step in installing any electrical component is to disconnect it from all power sources. A local circuit breaker or the main breaker can be used to do this. Whichever option is most practical for the installation.
How to turn off the power?
- If you want to switch off the electricity from a local circuit breaker, first figure out which circuit breaker supplies power to the outlet you want to turn off.
- You may also turn off the main breaker, but this would cut off all power in the house.
- Simply turn the switch once you’ve selected the suitable breaker.
- Check the LED indication to ensure there is no electricity to the outlet.
- If there are no indicators, you can examine the circuit with a volt meter or an ammeter.
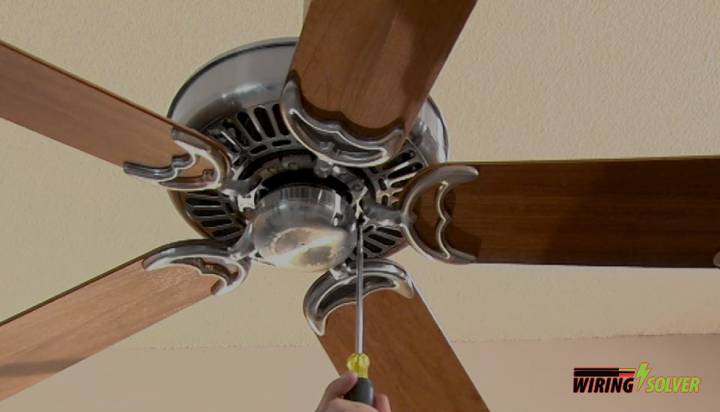
3. Removing the Switchboard Cover
The switchboard must be removed before moving on to the next steps. This is a very simple task and can be accomplished by a simple screw driver.
You might need to replace your old switchboard cover plate if it does not contain enough space to install the fan regulator.
How to remove the switchboard?
- Determine the screw type that secures the switchboard cover plate to the wall.
- Choose the right screwdriver for the job based on the shape of your screw. Phillips, tri-wing, flat head, and so forth.
- Simply remove the screw and the cover plate with the screw driver.
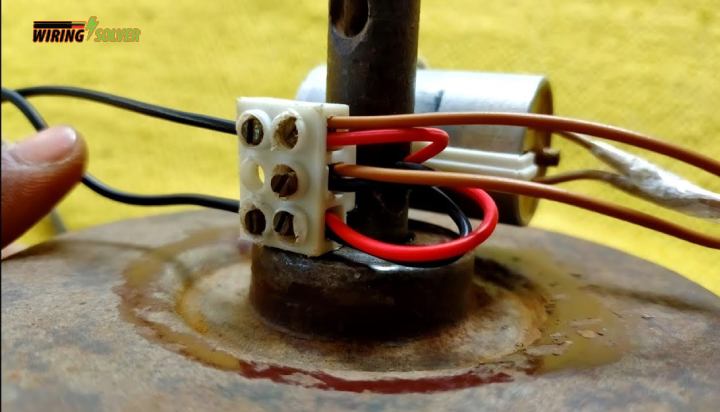
4. Identification of Positive and Neutral Wire
Both the switch and fan regulator you choose will contain two terminals. One is for positive line, the other is for neutral wire. It is a must step for how to connect fan regulator to the switchboard.
A number of test instruments can be used to determine which cable is the “positive” wire (contact, non-contact, meters, etc.). Use the following step-by-step tutorial if you are unfamiliar with such topics.
How to Identify Positive and Neutral Wires?
- Locate if there are black and red wires, usually the black wire is always neutral and red is the positive wire.
- You can also use a volt meter or an ammeter accordingly to check the polarity of the wires.
If for any reason you want a fan regulator connection without switch, you can easily do that as well. A switch isn’t always necessary. Often times regulators can also work as a switch.
5. Wire Connection
The most important part of any electrical component installation is making sure everything is connected properly. It’s possible that your equipment will suffer major harm if the wiring connections aren’t correct and secure. However, the connections are different if you’re trying to learn how to wire a 3 prong lighted toggle switch.

How to wire a fan regulator to a switchboard?
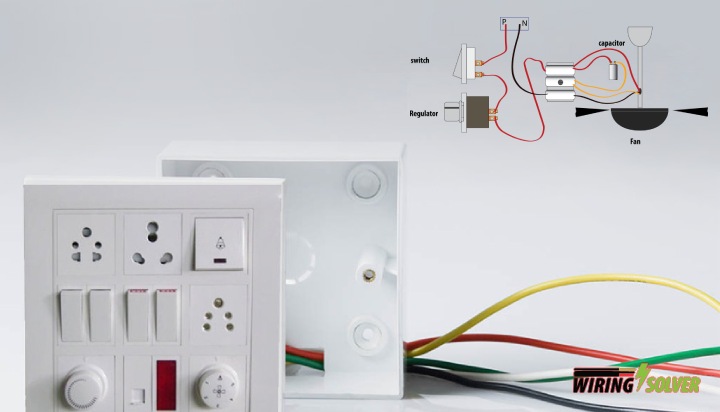
- The phase circuit breaker is on one end of the MCB, while the neutral is on the other.
- Connect the neutral end of the phase circuit breaker to the switch in the switchboard, and the phase circuit breaker to the ceiling fan directly.
- Connect the ceiling fan to the regulator and the switch to the regulator. Follow the above picture (Fig-1) for fan regulator connection diagram.
- When you turn on the switch, the fan will turn on, and the regulator will control the fan speed according to your preferences.
- Connect the regulator to the switchboard using appropriate screws.
- Put the switchboard cover plate back onto the wall.
6. Troubleshooting
It is a crucial step to troubleshoot any electrical component after installation to make sure it is working as intended.
Testing the fan regulator
- Switch on the electricity at the main panel or at the circuit breaker which you turned off at the beginning of the installation.
- Make sure the power is back on by checking the LED indicators of the switchboard.
- Turn on the fan.
- Make sure the regulator is not turned all the way down.
- Turn the regulator all the way up and ensure if your fan is running at its’ previous full speed.
- Try to slowly turn the regulator knob and check if it affects the fan speed.
- Often times fan regulators heat up and burn. But why do fan regulators burn? Due to the absence of load, the current may flow into the neutral wire and cause the regulator to burn.
If all the steps mentioned above, checks out perfectly, you can rest assured that you have made a perfect installation of a ceiling fan regulator to your switchboard.
Summary
In this article, I’ve gone through all the necessary steps on how to connect fan regulator to the switchboard. With the step-by-step instructions offered in this post, I hope that anyone will find connecting a regulator for their ceiling fan in the switchboard to be quite straightforward and uncomplicated.
However, when working with electricity, exercise caution. Even though the tasks are basic, they might result in catastrophic injury if they are not carried out properly. Before undertaking any electrical activities on your own, stay cautious and follow all essential measures.