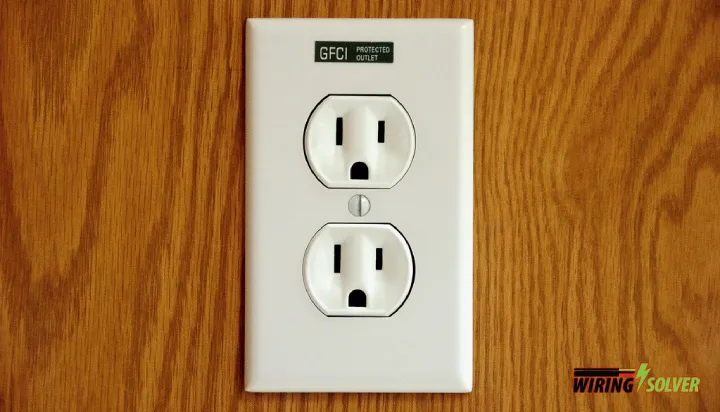
A GFCI outlet provides a level of protection that a regular outlet or a circuit breaker does not. Because of the differences between GFCI VS regular outlets, GFCI outlets become popular nowadays among the users of households and corporates. Installing a GFCI outlet with 3 wires can be done very easily and doesn’t require any mechanic. So in this article, I will be describing how to wire a GFCI outlet with 3 wires.
The larger size and front-facing buttons differentiate GFCI outlets from regular outlets. They usually come with either 2/3 or 4/6 wires. Things that must to done before installing a GFCI outlet are powering off the main switch, removing the cover plate, wiring the GFCI, testing and troubleshooting.
In this article, I’ll discuss everything you need to know about how to wire a GFCI outlet with 3 wires
Wire A GFCI Outlet With 3 Wires: Step-by-Step
1. Powering Off the Main Switch
It is always a must to shut down any power before working with electricity. This can be done with the help of the main breaker. This step is common even for learning how to install a GFCI outlet with 4 wires.
How to power off the main breaker?
- Locate the main breaker of your house. It is always at the front or basement of your house.
- Simply flip the switch.
- Check the LED indicator to further ensure if the power is off.
- You can use a multi meter also to check if the power is off.
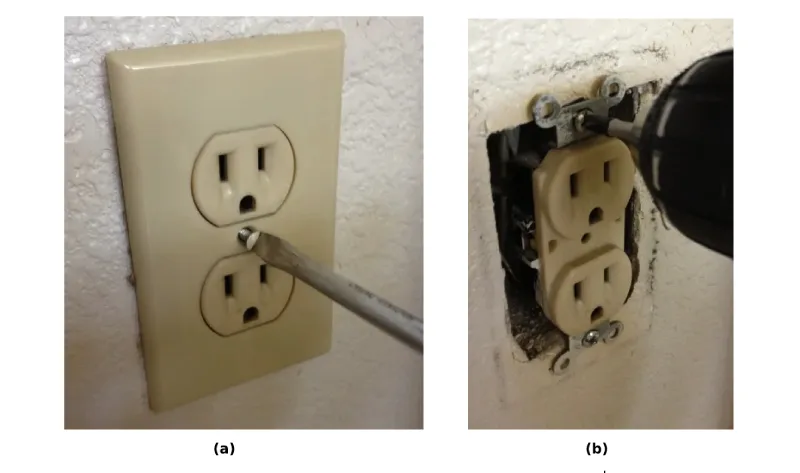
2. Removing the Cover Plate
It is a must to remove the cover plate, because the wires are usually covered behind them. This can be easily done with a help of a Philips screw or a flat head. You can also use a power drill with a screw head to do the job faster and more efficiently.
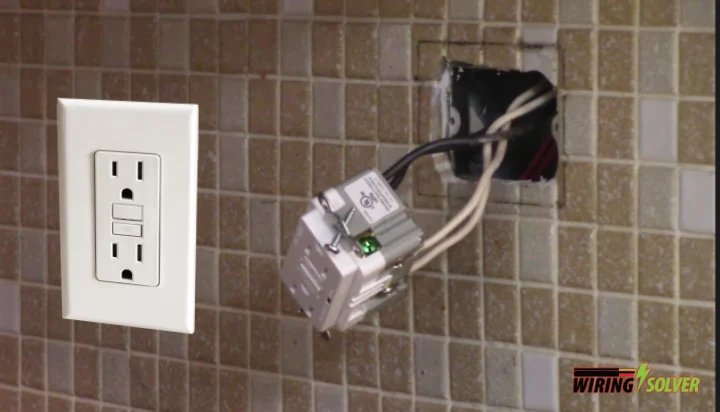
3. Wiring the GFCI
You might be wondering; how many wires can be in a GFCI outlet? GFCI outlets usually contain 3 wires, two of them are positive and neutral, while the other is the ground wire. Distinguishing them is very important for knowing how to wire a GFCI outlet with 3 wires.
The same steps can be followed to know how to wire a GFCI outlet with red black and white wires. But the steps for knowing how to wire GFCI outlet in series will be different.
How to wire a GFCI with 3 wires?
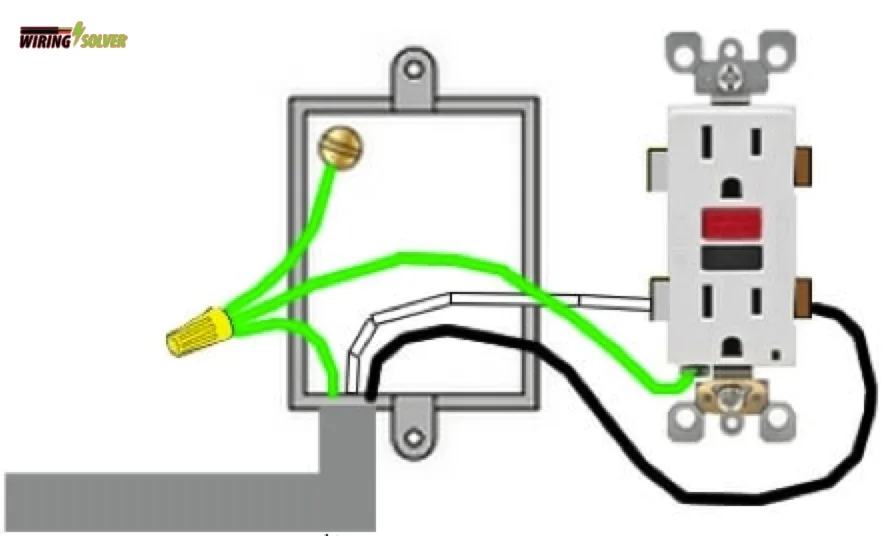
- Examine the markings on the GFCI to find the “Line” terminals. For this method, do not utilize the “Load” terminals. As a reminder, a colorful tape should have been attached to them.
- If required, use wire strippers to remove the wires. Connect the black “line” wire to the brass “hot” terminal and the white “line” wire to the silver (white) terminal.
- Leave enough wire to pull the receptacle out of the box at least 4 to 6 inches.
- Any grounding wires (bare or green) should be connected to the green grounding screws. To connect the wires, needle-nose pliers may be required.
- Ensure that any bare grounding wires do not come into contact with any other exposed terminals when you tuck the wires inside the box.
- Place the receptacle in the box and cover it with the lid.
- Follow the diagram provided above (Fig- 2) for the wiring procedure. But it will be different if you are trying to learn how to wire a GFCI outlet with 3 hot wires.
Testing & Troubleshooting
All GFCI outlets have two “test” and “reset” buttons on the front. These buttons are used to troubleshoot the GFCI and ensure that it is functioning properly. They are also used each 2/3 months for maintenance to ensure that the GFCI is properly functioning.
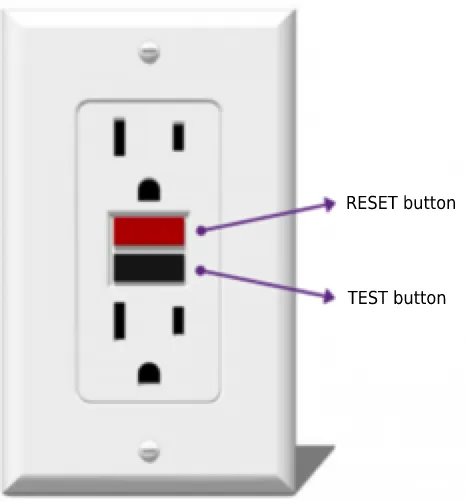
How to Test and Troubleshoot the GFCI?
- Turn on the power at the main panel and put a small lamp or night light or any other small electrical compliance into the socket.
- To switch on the light, press the “Reset” button on the GFCI if it is necessary.
- To turn off the light, hit the GFCI’s “Test” button. On the screen, there should also be a “Reset” button.
- If you know how to wire a GFCI outlet in series, and choose to do so, check the light in the nearby outlets if they are working properly.
- If they do not light up, you might need to check your wiring and re-wire your outlet properly again.
- Label the additional outlets as “GFCI Protected” using the labels that came with the GFCI receptacle.
Summary
In this guide, I’ve discussed all the necessary steps of how to wire a GFCI outlet with 3 wires. With all of the detailed instructions provided in this post, I am certain that anyone can easily and quickly wire a GFCI outlet with 3 wires.
Before performing any electrical activities on your own, take all essential safety measures. Good luck.
References:
- https://homeinspectioninsider.com/how-gfci-outlets-work/
- https://proelectronicsguides.com/how-to-wire-a-gfci-outlet-with-multiple-outlets/
- https://www.estesair.com/blog/difference-between-gfci-and-regular-outlet/
- https://www.quora.com/How-do-you-wire-a-GFCI-outlet-with-3-wires
- https://www.wikihow.com/Wire-GFCI
- https://mrelectric.com/blog/what-s-a-gfci-outlet
- https://www.serviceone.com/blog/article/gfci-versus-regular-outlet
- https://www.familyhandyman.com/project/how-to-install-gfci-outlets/
![How To Wire A 2 Pole GFCI Breaker Without Neutral? [Full Guide]](https://wiringsolver.com/wp-content/uploads/2022/05/How-To-Wire-A-2-Pole-GFCI-Breaker-Without-Neutral.jpeg)