GFCI outlets have recently become a popular choice among users for their excess safety and durable nature. In a battle of GFCI VS regular outlet, GFCI is sure to win. Therefore, many people are looking to install GFCI in their households. It is an easy task and anyone can easily learn how to install a GFCI with 4 wires.
GFCI often have either 2/3 wires or 4-6 wires. There are certain steps that one needs to know, in order to learn how to install a GFCI with 4 wires. Such as, turning off the power, removing the cover plate, identifying load and line wires, wire connection and troubleshooting.
Throughout this article, we’ll discuss all of these steps in details. So, let’s head on with the installation procedure.
Install A GFCI Outlet With 4 Wires:
The installation of a GFCI outlet is a simple process one can do himself. Check this step-by-step guide to learn installing GFCI outlet with 4 wires.
1. Turning Off the Power
The first and most crucial step to not only wiring a GFCI outlet with 4 wires, but installing any electrical component is to completely shut off any power that it is connected to. This can be done with the help of a local circuit breaker or the main breaker. Whichever is more convenient for the installation.
How to turn off the power?
- If you want to turn the power off from a local circuit breaker, first identify which circuit breaker is used for supplying power to the chosen outlet before turning it off.
- The main breaker can also be turned off, but this shuts off all power of the house.
- After you’ve chosen the appropriate breaker, simply flip the switch.
- Make sure there is no power to the outlet by checking the LED indicator.
- If there are no indicators, you may either use a volt meter or an ammeter to check the circuit.
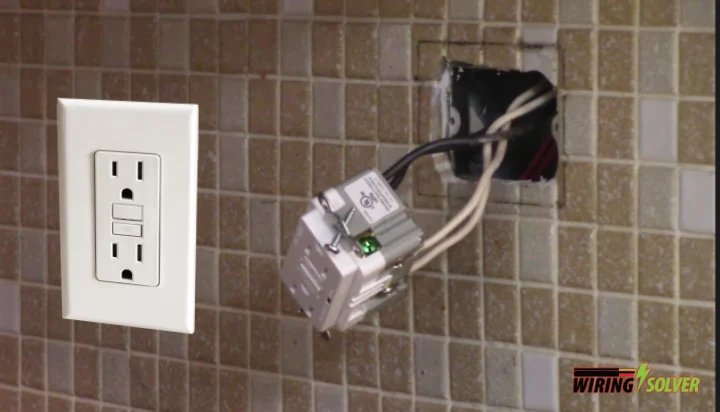
2. Removing the Cover Plate
The previous outlet cover must be removed before wiring a GFCI outlet with 4 wires. This is a very simple task and can be accomplished by a simple screw driver. It is a step which is also common for knowing how to wire a GFCI outlet with 3 wires as well.
This is usually done because GFCI outlets are bigger in shape than regular outlets, and hence, will not fit into the previous cover plate.
How to remove the cover plate?
- Identify the type of screw which is used to secure the cover plate to the wall.
- Choose an appropriate screwdriver according to the shape of your screw. E.g. Phillips, tri-wing, flat head etc.
- Simply use the screw driver to remove the screw and the cover plate.
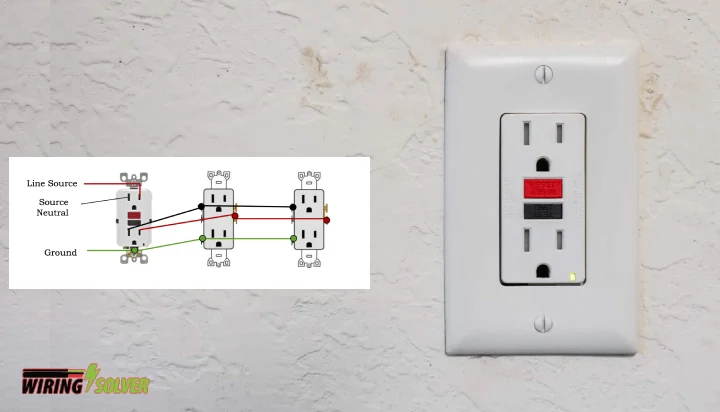
3. Identifying Load and Line Wires
GFCI outlets which contain 4 to 6 wires usually have two different sets of wires known as load and line. One of these two sets usually supplies power to the outlet, while the other carries power further down the line. It is an essential step for knowing how to install a GFCI with 4 wires.
There are a variety of test tools that may be used to distinguish which cable is the “supply” (contact, non-contact, meters, etc.). For people who are unfamiliar with such things use the following step-by-step guide.
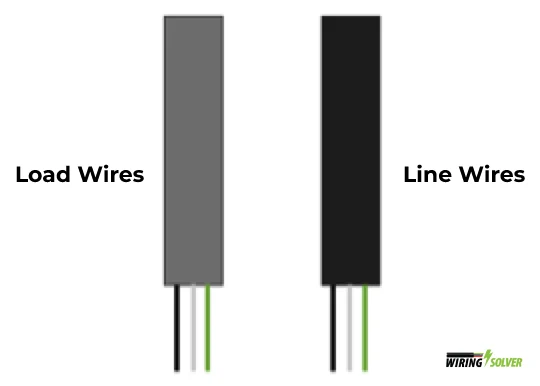
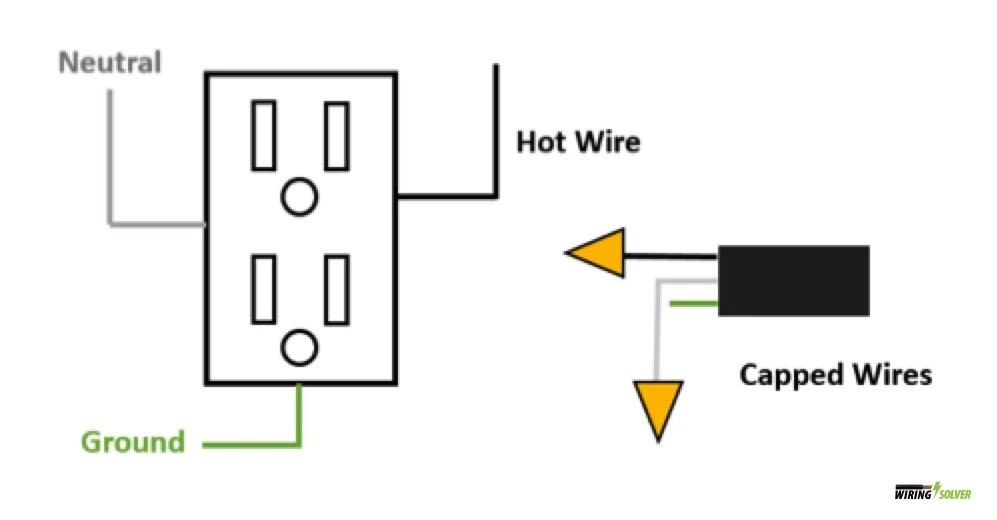
Fig 1: Identifying Load and Line Wires
Identifying Load and Line Wires
- Remove 1 white “neutral” and 1 black “hot” wire from each of the two wires and cover them with a wire cap or tape them up (Fig-1. b).
- Reconnect electricity at the main fuse or breaker box and reinstall the receptacle in the electrical box.
- To check if electricity is flowing after wiring a GFCI with 4 wires, plug in a night light or other device and push the “Reset” button (if required). If the receptacle does not turn on, your capped wires are most likely the “line” or main power wires, providing they are in good operating order.
- Remove the receptacle and turn off the power at the main panel. You can label your “line” and “load” cables using different colored tapes or anything else you choose.
4. Wire Connection
The most significant step is to properly wiring up the GFCI to ensure connection. Without accurate and secure wire connections, it may cause serious damage to your equipment.
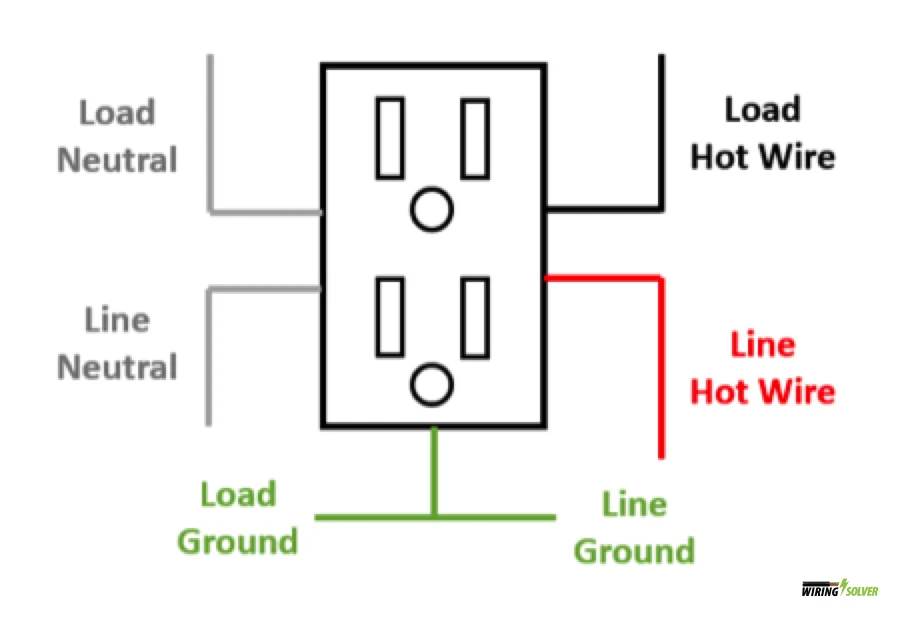
How to wire a GFCI with 4 wires?
- Connect your white wire labeled as “line” to the GFCI’s silver “line” connection.
- Connect your black wire labeled as “line” to the brass “hot” connector of the GFCI’s “line” section.
- Remove the yellow sticker (or other colored tape which you’ve used) from the receptacle’s “load” terminals. These terminals will be used to connect other lines further down the circuit to supply power.
- Connect the white wire for “load” to the silver “load” terminal and the black wire for “load” to the “hot” brass “load” terminal.
- Connect your ground wires to the GFCI’s green grounding nut. Fold your cables inside the box, ensuring that the grounding wires do not come into contact with any exposed “line” or “load” connections.
- Another optional step you can do before replacing receptacles into a box, especially a metal box, is to wrap them in insulating electrician’s tape. This adds an extra degree of protection against inadvertent contact with live components.
- Screw back the cover plate of the outlet.
5. Troubleshooting
The All GFCI outlets contain two face buttons labeled as “test” and “reset”. These buttons serve the purpose of troubleshooting the GFCI to make sure it is working as intended.
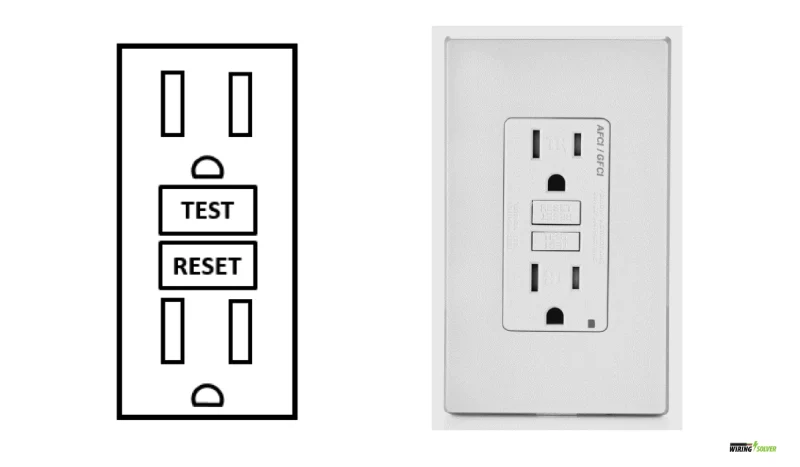
Testing the GFCI
- Switch on the electricity at the main panel, then plug in a lamp or night light into the outlet.
- If required, press “Reset” on the GFCI to turn the light on.
- To turn off the light, tap the “Test” button on the GFCI. The “Reset” button should also appear on the screen.
- To restore power to the gadget, press the “Reset” button.
- If you wire a GFCI outlet with multiple outlets, test the light in the surrounding outlets to the GFCI using the two cable method mentioned above.
- Use the labels that come with the GFCI receptacle to identify the additional outlets as “GFCI Protected.”
Summary
In this article, I’ve gone through all the necessary steps of how to install a GFCI outlet with 4 wires. With all the step-by-step instructions provided in this article, I hope that anyone will find it very simple and easy wiring a GFCI outlet with 4 wires with its help.
Be cautious while working with electricity Even though the tasks are simple, without proper precautions, they might cause serious injuries. Stay safe and take safety precautions as necessary before attempting any electrical tasks yourself.
![How To Wire A 2 Pole GFCI Breaker Without Neutral? [Full Guide]](https://wiringsolver.com/wp-content/uploads/2022/05/How-To-Wire-A-2-Pole-GFCI-Breaker-Without-Neutral.jpeg)