Key Points:
- Knowing what all those connections are connected to is a critical first step in this procedure. Three separate colored wires should always be coming from the outlet and going into your gadget.
- Wire identification has to be done according to the specific color code of the country, as each country follows a different color code.
- The wiring has to be secure in order to prevent shocks and other hazards.
Appliances that require 220- or 240-volt power don’t always come with plugs that fit into a socket. Therefore, it is often times required for the user to install the plug himself. If you were trying to figure out how to wire 220v plug with 3 wires, you have come to the right place.
Whether the domestic outlet has three or four prongs determines which plug end is required. Each 220 plug must include a neutral wire, a ground wire, and two hot wires, according to newer electrical rules. But what if you have 3 wires? Can you wire 220 with 3 wires? Yes, you absolutely can!
The steps include gathering necessary tools and equipment, identifying the wires, connecting the wires and troubleshooting the installation after the steps are completed.
Now, without further ado, let’s take a deeper look into these steps and the entire installation process.
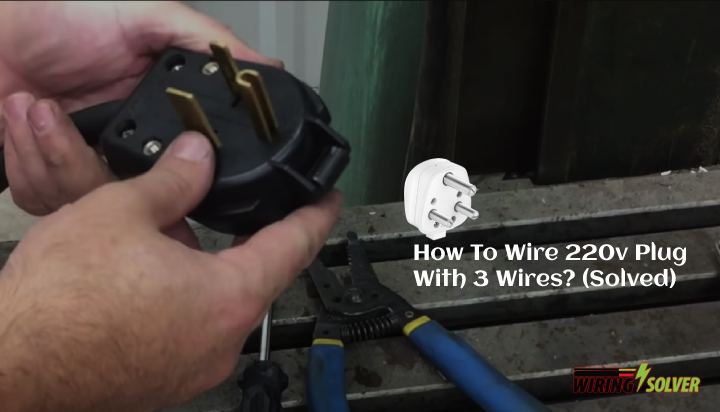
How To Wire 220v Plug With 3 Wires:
The process of wiring a 220v plug with 3 wires is a simple endeavor. But it must be done while taking proper precaution and safety measures.
1. Gathering Necessary Tools
Before starting the process for wiring a plug with three wire, you have to gather some tools that’ll help you proceed with the steps in an easy and effortless manner. These tools are necessary for any electrical wiring work.
Necessary Tools and Equipment
- Wire cutters: Required to cut wires into the necessary length along with removing excess plastic covering from the wires to expose the actual copper wire beneath it. The actual connection with the plug has to be made with this copper section.
- Screwdriver: The plugs are often designed to be closed with screws. So, to access the actual terminal to connect the wires, you have to remove the cover, for which you have to remove the screws. Hence, you need the properly shaped screwdrivers for the task.
- Appropriate Plug: You have to choose the appropriate plug according to your household outlet or socket. You can either go for two prongs or three depending on your socket structure.
2. Identifying the Wires
The crucial step before attempting to connect the wires to the plug is to properly identify which wire is which. It is a common step in every installation. Even if you’re trying to wire something in parallel vs series circuit, you must correctly identify the load wire, the neutral wire and the ground wire.
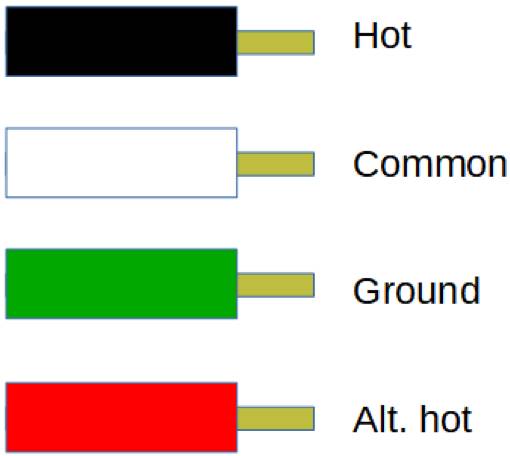
How to identify load, neutral and ground wires?
- Make sure to double check your countries accurate color code for hot, neutral and ground wires before proceeding with this step.
- Usually, the HOT wire is BLACK, and terminates on the GOLD terminal lug. The WHITE wire is the NEUTRAL, and terminates on the SILVER terminal lug. The third line is the GROUND, which terminates on the GROUND or GREEN terminal lug.
- However, if your wiring follows the international wiring color code, HOT wire is BROWN. The BLUE wire is the NEUTRAL. The third line is the GROUND, which terminates on the GREEN/YELLOW stripe terminal lug.
3. Wire Connection
It is crucial to make the wire connections accurately and securely in order to protect both the compliance that you’re connecting the plug to, as well as your entire household circuit.
If you’re wondering, “How do you wire a 220 3 phase plug?”, you can follow these steps up to a certain point. Or you could learn how to convert 3 phase to single phase 220v instead.
How to wire 220v plug with 3 wires?
- With wire cutters, remove 3/4 inch of insulation from the ends of each wire. Black, white and green wires are common in three-wire power cables. However, do follow the color code for your country to be sure about the wires, as it can differ from country to country.
- With a slotted screwdriver, loosen the screw that holds the housing to the plug.
- With the stripped wires going through the front, slip the rear end of the enclosure over the power cable.
- Using a screwdriver, loosen the terminal screws on the rear of the plug.
- Hold a three-prong 220 plug with the two slanted prongs on top and the straight one on the bottom, facing away from you.
- Wrap the stripped end of the red, or hot, wire around the top left terminal and tighten the terminal screw securely, making sure that all wire strands are hidden behind the screw head.
- Connect the black and green wires to the top right and bottom right terminals, respectively.
- To cover the electrical wire, pull the plug housing up the power cable and into position over the rear end of the plug.
- Tighten the screw that holds it in place.
4. Troubleshooting
After the installation of the plug, you must properly troubleshoot the circuit to ensure that you have properly made all the connections. If the connection is faulty it can easily damage your electrical compliance and even cause serious accidents in your household circuitry.
Troubleshooting the installation
- Plug the compliance to an electrical outlet or socket.
- Turn it on and check if the compliance is working properly.
- If it is not working properly, check your wiring.
- If you have attached the wires properly, but it is still not working, it is due to poor connection between the wire and the plug.
- Reopen the plug and make the connections more securely and it should work this time round.
Summary
Throughout this article, I’ve explained in detail all the steps required for you to know how to wire 220v plug with 3 wires. By following these simple steps, you can install a plug with 3 wires yourself.
Exercise extreme caution while working with electricity. Even though the requirements are simple, failure to carry them out effectively might result in catastrophic damage. Stay vigilant and take all necessary precautions before engaging in any electrical activity on your own.


![Understanding Single Phase Wire Color Code [Explained]](https://wiringsolver.com/wp-content/uploads/2023/01/Understanding-Single-Phase-Wire-Color-Code-Explained.jpeg)
![How To Wire A 4 Way Switch? [Complete Guide]](https://wiringsolver.com/wp-content/uploads/2022/07/How-To-Wire-A-4-Way-Switch-768x432.jpeg)