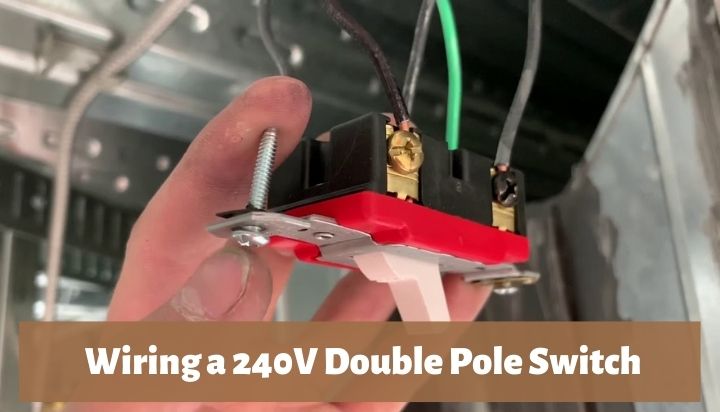
There are a variety of switches available for users on the market. Each with its own set of functionalities which sets them apart from the rest. One such switch is a double pole switch.
Therefore, users often feel the need to install a 240V double pole switch. But how to wire a 240V double pole switch?
The procedure of installing a double pole switch is quite simple. The first step is turning off the power, wiring the switch, and finally troubleshooting. You will also need to acquire a few tools before moving on with the procedure.
I will go through the steps in detail throughout this article so that you may take up the task of installing a double pole switch yourself. Along with stating how you may troubleshoot it after installation.
Steps to Wiring a 240V Double Pole Switch – Full Guide
The installation procedure of a 240V double pole switch comprises quite a few individual steps. Such as the gathering of necessary tools, wiring, and troubleshooting. I will go over these steps in this segment.
1. Gathering Necessary Tools
The first step is to gather the necessary tools for the task. These tools make the installation much easier for the user. As well as providing protection to the one undergoing the task.
What are the necessary tools to install a double pole switch?
- Rubber Gloves and Boots
- Wire Strippers
- Electrical Tape
- Voltage Tester
- Screw Driver
These are some of the tools and components that would aid you in the installation procedure.
2. Turning off the Power
You must turn off the electricity, shutting off the supply to your entire house before installing a 240V double pole switch. This is because you will have to work on multiple separate circuits. Therefore, all of them must have their power turned off.
How to turn off the power?
- Locate the main breaker of your household and identify the breaker that supplies power to the entire panel.
- Flip the switch after you have figured out the proper circuit breaker.
- To check whether the power has turned off, you may check the LED indicators of your electric panels.
- If your board does not have an LED indicator, you can use a non-contact voltage tester to test for power.
- Take necessary safety precautions before proceeding with any electrical operations. Such as wearing rubber boots and gloves.
3. Wiring the Double Pole Switch
Wiring is the most crucial step of any electrical installation. There are a few steps to properly wiring a double pole switch. The steps regarding how to wire a 240V double pole switch are provided as follows.
Note: When it comes to electrical wiring, a double pole switch can be wired in a few different ways. The next directive is one for greater safety, and it is as follows. Controlling two independent circuits with either a single throw or a double throw is one example of an alternative setup.
Steps to wire a 240V double pole switch
- Utilize the non-contact voltage tester to confirm that the flow of electricity has been stopped once again before proceeding with the actual installation.
- It will be much simpler to make the connections after the positive and negative wires that are coming out of the wall have had their insulation stripped. You may use a wire stripper for the task, as it will make the task much easier.
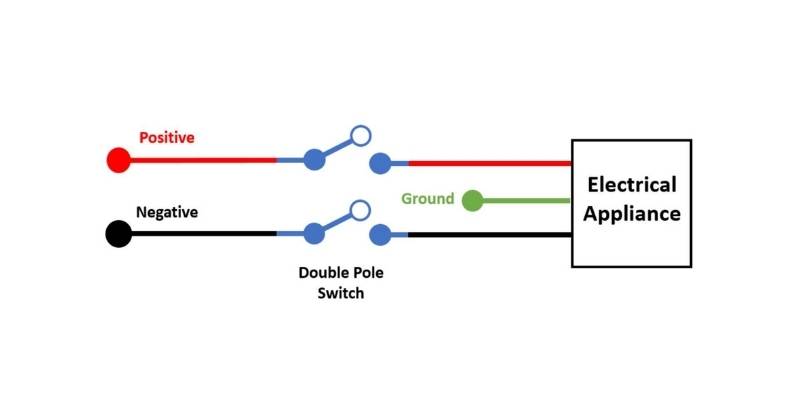
- Connect the wire that is labeled as positive or hot as well as the wire that is labeled as neutral to either the left or the right side of the switch.
- Connect the positive and negative ends of the wire that is coming back to the device in a manner that is analogous to that of the source. If you run into any problems, go to the diagram (Fig. 1) that was provided above and follow it appropriately.
- Check that all of the connections are secured to each terminal and won’t come loose easily.
- Cover any exposed wire with electrical tape, if any. Otherwise, these may cause short circuits, electrical fires, or electrocution.
- You can mount the switch on the wall or the switchboard, whichever you find more convenient. You can use a few screws to attach the switch to your desired place.
Following these steps will allow you to easily and trouble-freely wire a 240V double pole switch. In order to reduce the risk of getting electrocuted or having a short circuit, it is a must that the connections are tight and that there is no exposed wiring anywhere.
Troubleshooting
The final step is to troubleshoot the double pole switch, to ensure that the installation was done properly. The troubleshooting of any newly installed electrical appliances is strongly recommended at all times. The steps are provided as follows.
How to troubleshoot the installed double pole switch?
- Turn the power on from the main panel.
- Make sure that the power is back on with the help of the voltage tester.
- Turn the switch on.
- Check whether the appliance has been powered on or not.
- If the device has been turned on, then you may conclude that the installation was done properly.
- If not, then you may need to recheck the wiring.
- Rewire if needed following the diagram provided above.
The troubleshooting process is an essential stage since it assists in the diagnosis of any problems that may exist with the installation. If they are not discovered in a timely manner, these seemingly minor issues could develop into significant risks. Such as short circuits or warm switches.
Summary
If you wanted to know how to wire a 240V double pole switch, this article should be the perfect guide for you. I hope that it can help you install any double pole switch yourself.
If you are still unsure about how to proceed with the installation, you might want to seek the assistance of a trained specialist. Because it is not advisable to dive headfirst into electrical topics without first acquiring adequate knowledge of the processes involved.
References: